
Operations Manual
*Your vans height clearance is about 9 feet 2 inches. Promaster builds only.
Inverter operation
You can easily control the operation of your Victron Multiplus inverter with your touchscreen.
Turning on your inverter

Swipe left or right on your screen until you reach this screen. You will see in the bottom center there is an option called AC MODE. This controls your inverter.

When you want to use your water heater, microwave, air conditioner or any of the household 110v outlets you need to turn your inverter on. To do this simply press the AC MODE button until you see the word ON. You will notice a little white bar fill up below the word. After a few seconds your inverter will turn on. It is recommended that you turn the inverter OFF when not using it. To do this you simply press the button again until you see the word OFF

When plugged into shore power
When you have the van plugged into shore power at a campground or house it is recommended that you put the inverter into CHARGER ONLY mode as shown above. To do this simply press the AC MODE button until you see CHARGER ONLY mode.
This mode will pass through power from the grid to your van’s AC powered devices while also charging your battery. If grid power unknowingly goes down the inverter will not start drawing power from your battery without you knowing.
New Victron Multiplus Venus Firmware Operation
If you have the newest firmware update the process for turning on the inverter changes slightly.

Tap the screen and go to the Overview screen that looks like the above picture

Press the Inverter/Charger box. Near the top of the next screen you will see “Mode”. And to the right of “Mode” it will display the current state of your inverter. It may say Off, On, Charger Only or Inverter Only. Whatever the current state of your inverter is. Tap that.

When you tap that it brings up the above options list. Choose the setting you want and press “set”. Generally you want to choose “On” when running on battery power and “Charger Only” when plugged into shore power.
Resetting the battery charge percentage to 100%
Sometimes after the electrical system has been shut down the Victron Cerbo GX will not show the battery state of charge on the touchscreen. Here is how you can manually reset the Cerbo to show 100% state of charge once you are sure the battery is fully charged to 13.4-13.8 volts

Press the screen once to bring up the bottom options of PAGES and MENU. Press MENU
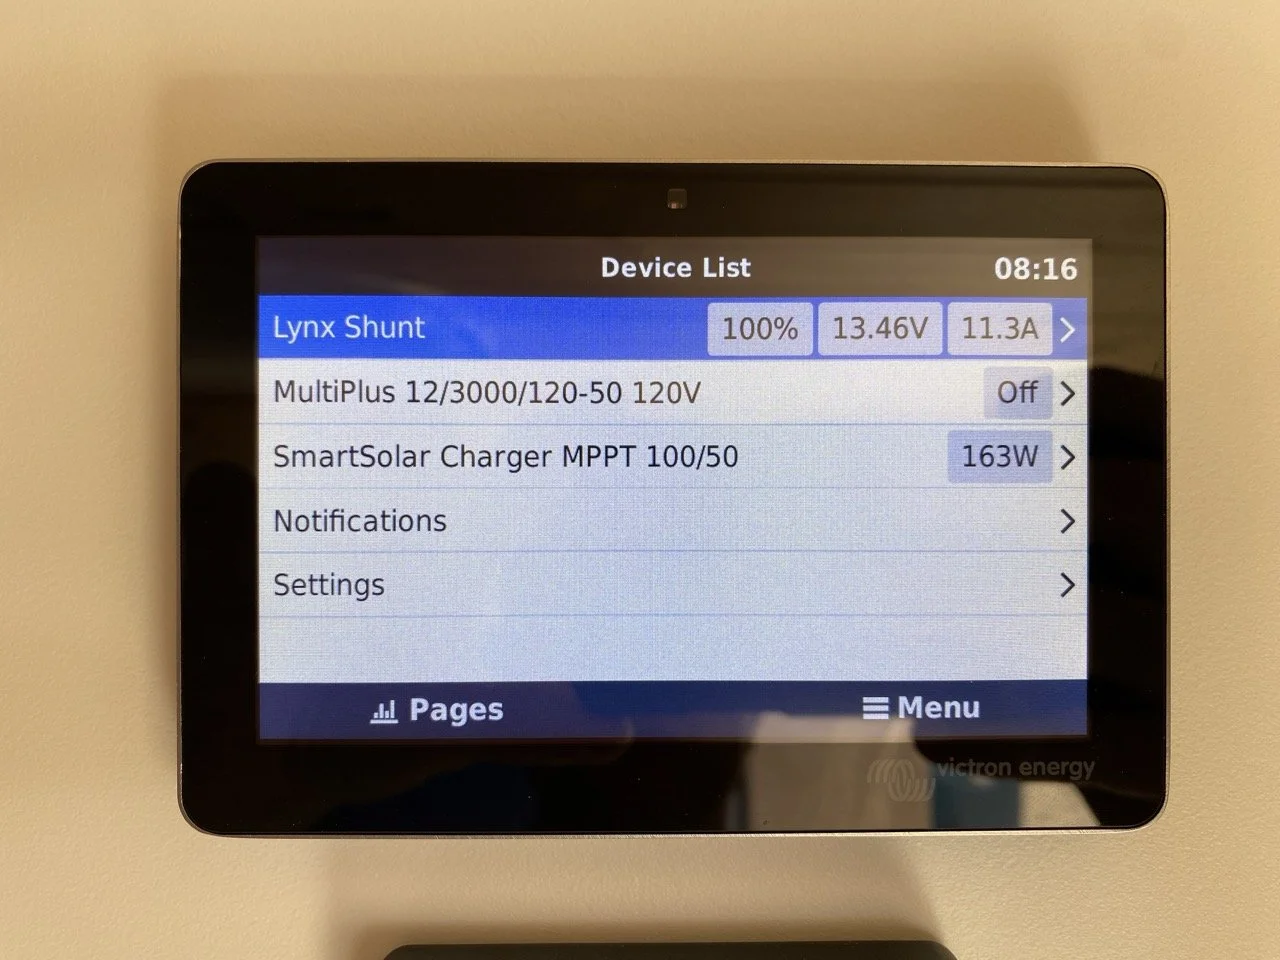
Press LYNX SHUNT
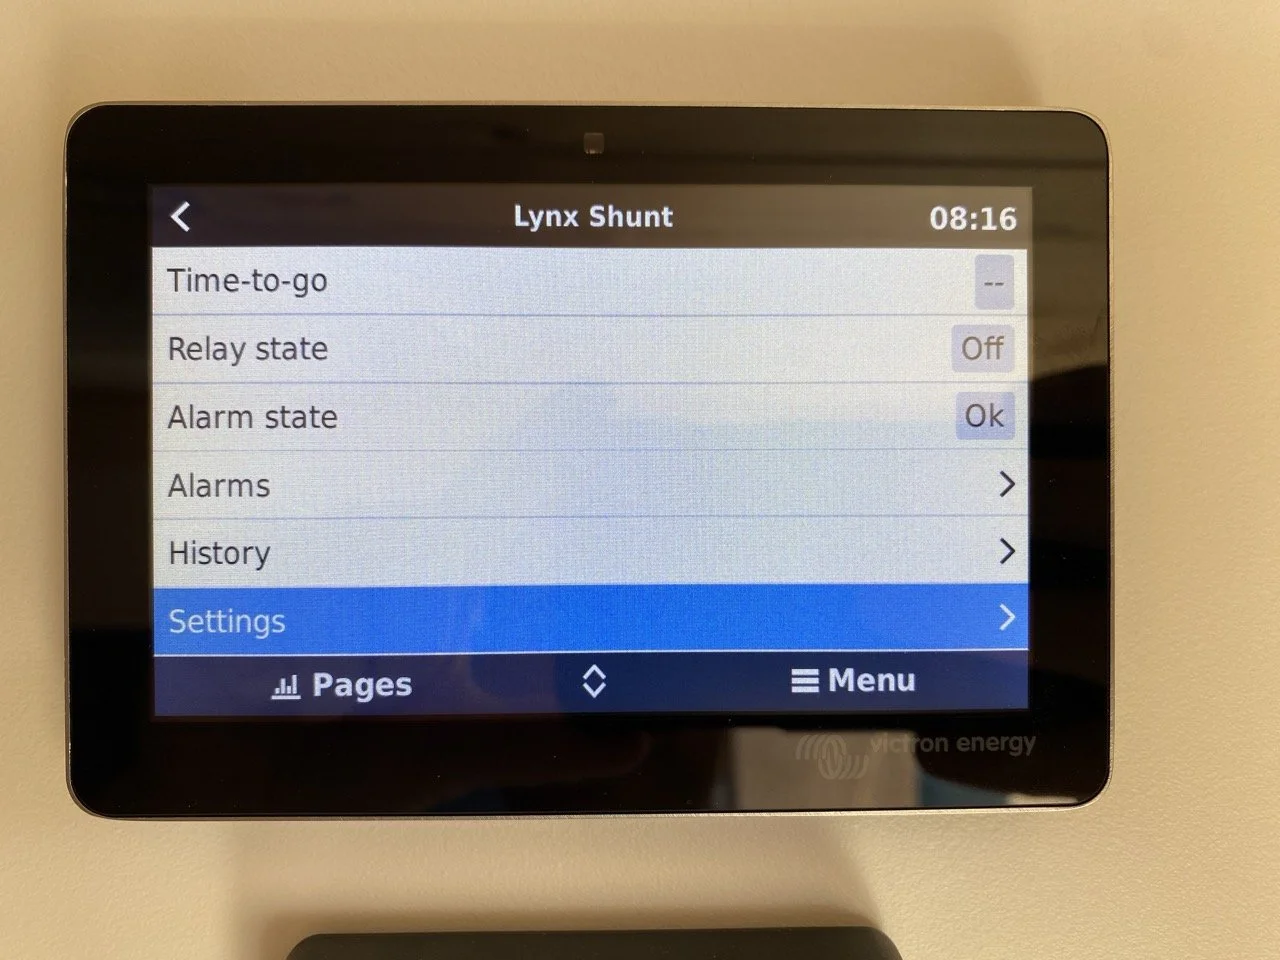
Press SETTINGS
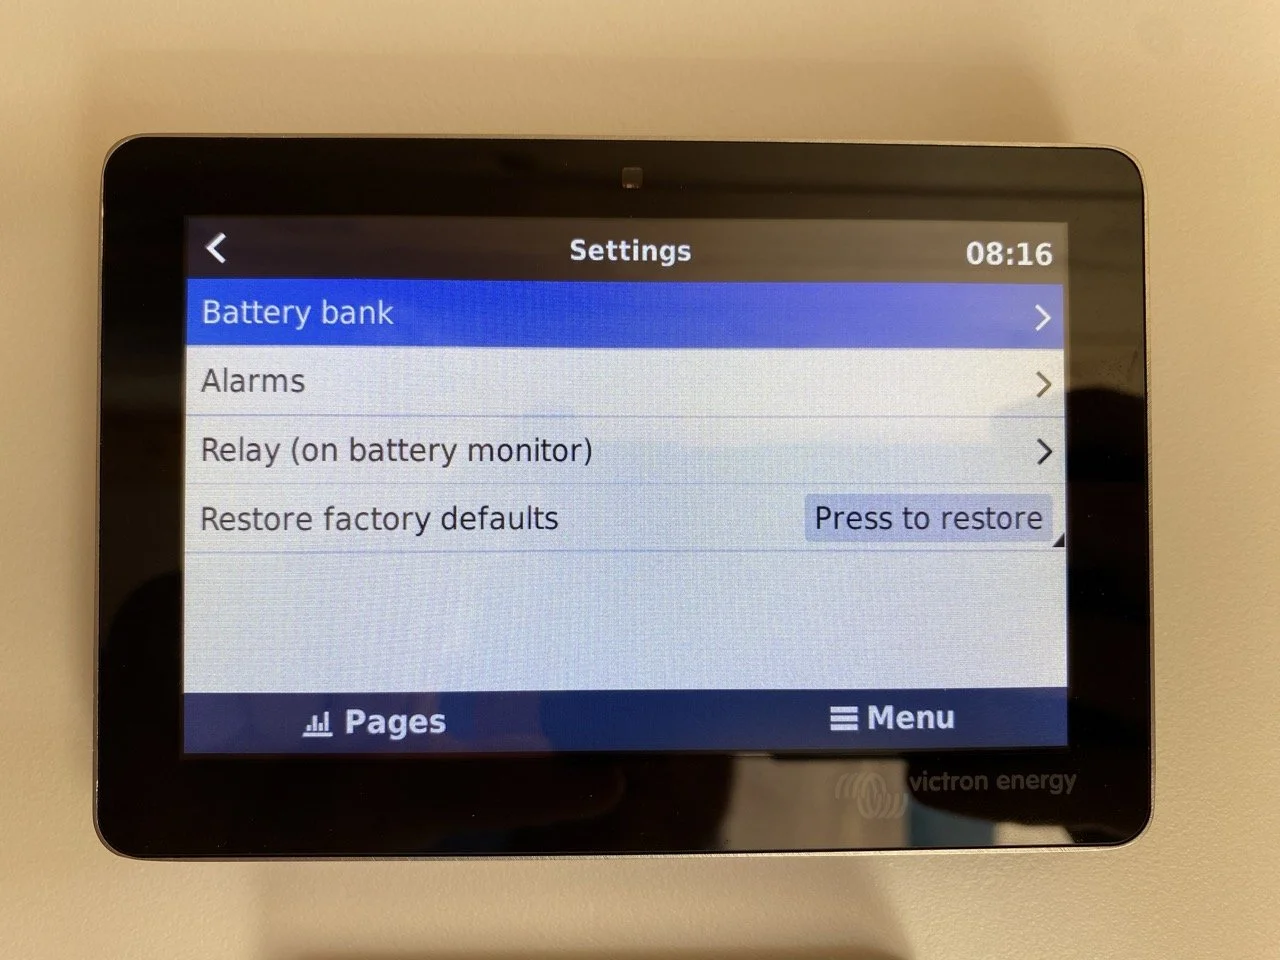
Press BATTERY BANK
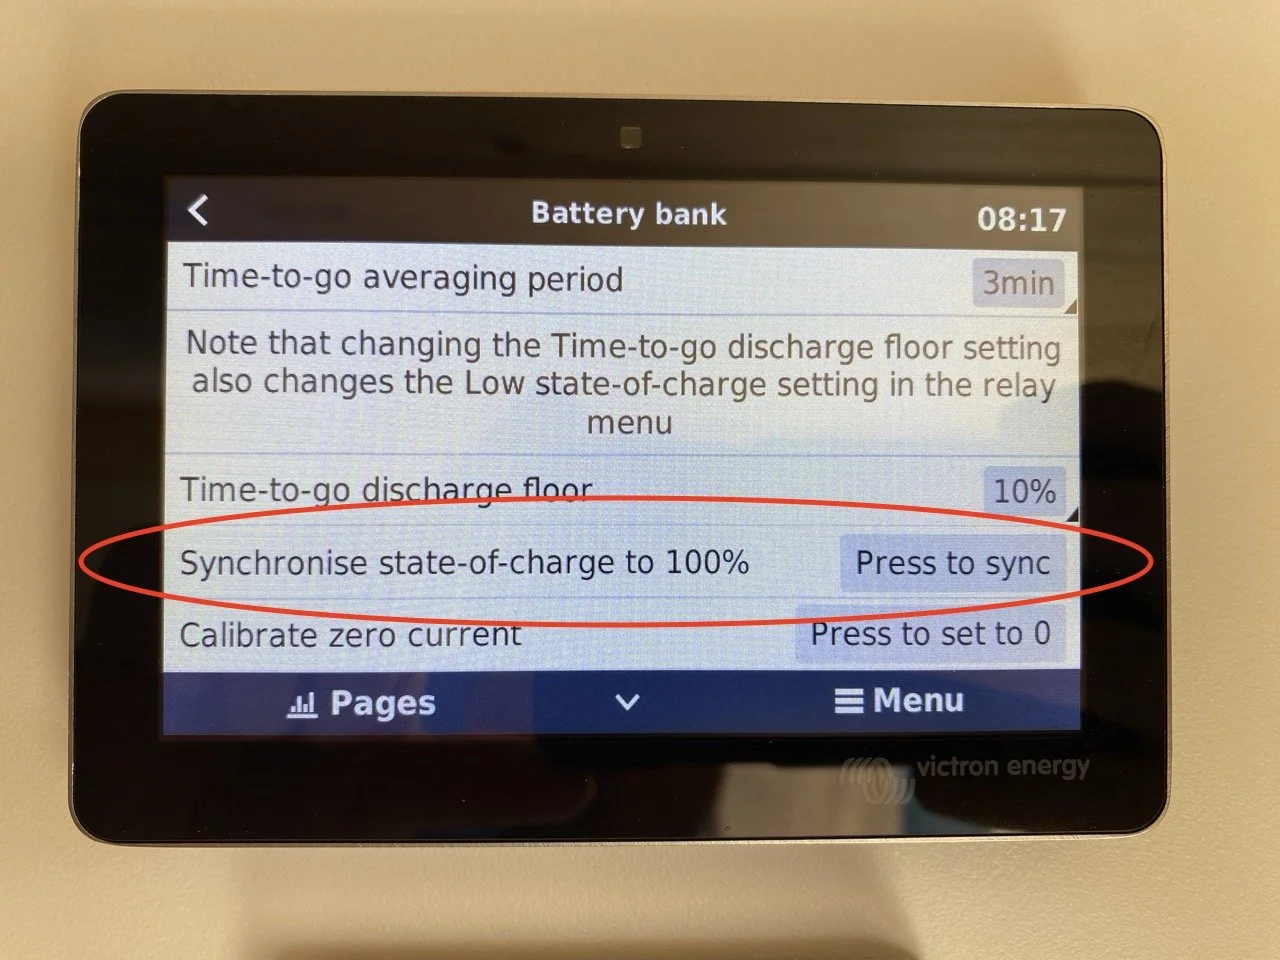
Scroll down until you see SYNCHRONISE STATE OF CHARGE TO 100%. Press on PRESS TO SYNC. You can then return to the main system screen by pressing PAGES at the bottom.
The Multiplus inverter is capable of up to 2,400 watts of output continuously. So keep in mind that you can typically only have one major power draw running at a time. A major power draw would be things like the air conditioner, cooktop or water heater. You can check how much power an AC powered device is using by checking the “AC Loads” reading on your touchscreen.
HEATER OPERATION
How to operate the espar gas heater
Your Espar gas heater comes with an Easystart Pro Controller. This is used to turn the heater on and off, set timers and automatically adjust for elevation. Espar recommends running the heater for 10-15 minutes at least every 1-2 months as preventative maintenance. The heater will not operate when your vans gas tank is at or below 1/4 tank remaining. This is a safety feature that prevents you from being stranded without gas.
Below is a simple guide for turning your heater on and off. If you would like a deeper dive into the options your heater has here is a great video from AVC explaining those.

Press the main button to wake the unit. Make sure the symbol with the 3 squiggly lines is selected and press the button again.

On this screen select the temperature you want the heater set to and press the button again.

On this screen select the amount of time you want the heater to run for. 10 minutes is the smallest amount of time. You can also set it on the infinity symbol which means the heater will always run until it reaches the set temperature. Once you select your time press the wheel again and your heater will start.
water heater operation
Turning on the water heater
Your 2.5 gallon water heater operates on 120v, just like the plugs in your house. So in order to run the water heater you must first turn on the inverter. Follow the directions in the section above and turn your inverter ON.
Important: Never turn your water heater on if there isn’t water in the water heater. This will damage the unit.
Once the inverter is on you are ready to turn on your water heater. To do this locate your timer switch which is inside the door under the sink. You will see a timer with multiple increments of time on it. Press the 10 or 15 minute button once. This will turn the water heater on for a set amount of time and automatically turn it off. 10-15 minutes is enough time for hot water. After 10-15 the water heater will automatically turn off and you are ready to use the hot water.
Winterizing the water heater
Bosch Water Heater:
The Bosch water heater has two different methods for winterization.
After draining your fresh water tank, fill the fresh water tank with 5 gallons of RV non toxic water system antifreeze. Then turn on your pump with the kitchen sink open and run the cold water until you see antifreeze come out. Then switch the faucet to hot water until you see antifreeze come out. This means your water heater is filled with antifreeze now which will prevent it from freezing. Also make sure to turn the rear outdoor shower lines on after you are done with the sink faucet to make sure those lines are protected from freezing .
If you winterize your van via blowing out the lines you will have to fully remove the water heater from the system when you are done since you can not fully blow out the Bosch water heater with air. To remove the water heater disconnect the hot and cold screw on flexible lines on the water heater. Then remove the pressure relief valve pex line at the first fitting using a pex removal tool. Take the water heater outside of the van and turn it upside down to drain it.
Links for parts
If you want to take advantage of your extruded aluminum framing by adding things to it, these links will help you find the parts you need.
Your van framing is made out of 15 series and/or 10 series extruded aluminum. 15 series is 1.5 inch profile and 10 series is 1 inch profile.
15 Series extrusion:
https://www.tnutz.com/product/ex-1515l/
10 series extrusion:
https://www.tnutz.com/product/ex-1010/
Drop in T-nuts:
5/16-18 is the thread size for most things built with 15 series(1.5 inch) extrusion in the van build. You can get smaller thread sizes depending what you need to mount. For example M5 usually works for a lot of smaller stuff. M5 is the size of bolt used for the toilet bench door for example.
https://www.tnutz.com/product/db-015/
Parts made out of 10 series(1 inch) extrusion require 10 series t-nuts. The standard thread size for 10 series hardware is 1/4-20”.
https://www.tnutz.com/product/db-010/
Button Head Socket Cap Bolts.
5/16-18 thread size is the standard throughout the van build on the 15 series extrusion. Smaller M5 bolts may be used depending on what you need to mount. If you are using standard corner brackets or flat brackets 5/8” is the correct length of bolt. If mounting something very thin you may need a shorter screw so it doesn't bottom out.
For 10 series 1/4-20 thread size is standard. 1/2” length is what you would want for attaching typical extrusion brackets to 10 series.
https://www.tnutz.com/product/imperial-button-head-ss/
15 Series Corner Bracket:
https://www.tnutz.com/product/cb-015-b/
15 Series Flat Bracket:
https://www.tnutz.com/product/jp-015-a/
10 Series Corner Bracket:
https://www.tnutz.com/product/cb-010-b/
10 Series Flat Bracket:
https://www.tnutz.com/product/jp-010-a/
There are many other types of connectors and accessories on that site. You can also find a lot more accessories on the 80/20 site:
Other helpful accessories:
Tie down D-rings for 10 series and 1/4” bolt:
https://www.amazon.com/dp/B09YM1JNKJ
Tie down D-rings for 15 series and 5/16” bolt:
https://www.amazon.com/dp/B0D5H4X84Q
3D printed quick hooks, hangers and eyes for 15 series:
3D printed quick hooks, hangers and eyes for 10 series: